For years I have used IPSec and OpenVPN, but they are not always the easiest to setup. Recently I discovered how simple VPN config can be with Wireguard. If you follow this guide, you can have a VPN up and running in less than 10 minutes (given that you know Docker).
Introduction
Wireguard
If you’re reading this, you problably already know that Wireguard is an open source, modern VPN that aims to be performant and easy to configure.
Read more on their website about it if you don’t believe me 😉
WireGuard® is an extremely simple yet fast and modern VPN that utilizes state-of-the-art cryptography. It aims to be faster, simpler, leaner, and more useful than IPsec, while avoiding the massive headache. It intends to be considerably more performant than OpenVPN. WireGuard is designed as a general purpose VPN for running on embedded interfaces and super computers alike, fit for many different circumstances. Initially released for the Linux kernel, it is now cross-platform (Windows, macOS, BSD, iOS, Android) and widely deployable. It is currently under heavy development, but already it might be regarded as the most secure, easiest to use, and simplest VPN solution in the industry.
wg-access-server
Even though Wireguard is not hard to setup, there is something that makes the setup even simpler:
wg-access-server is an open source project that combines Wireguard with an admin interface in one easy to install binary:
wg-access-server is a single binary that provides a WireGuard VPN server and device management web ui. We support user authentication, 1 click device registration that works with Mac, Linux, Windows, Ios and Android including QR codes. You can configure different network isolation modes for better control and more.
This project aims to deliver a simple VPN solution for developers, homelab enthusiasts and anyone else feeling adventurous.
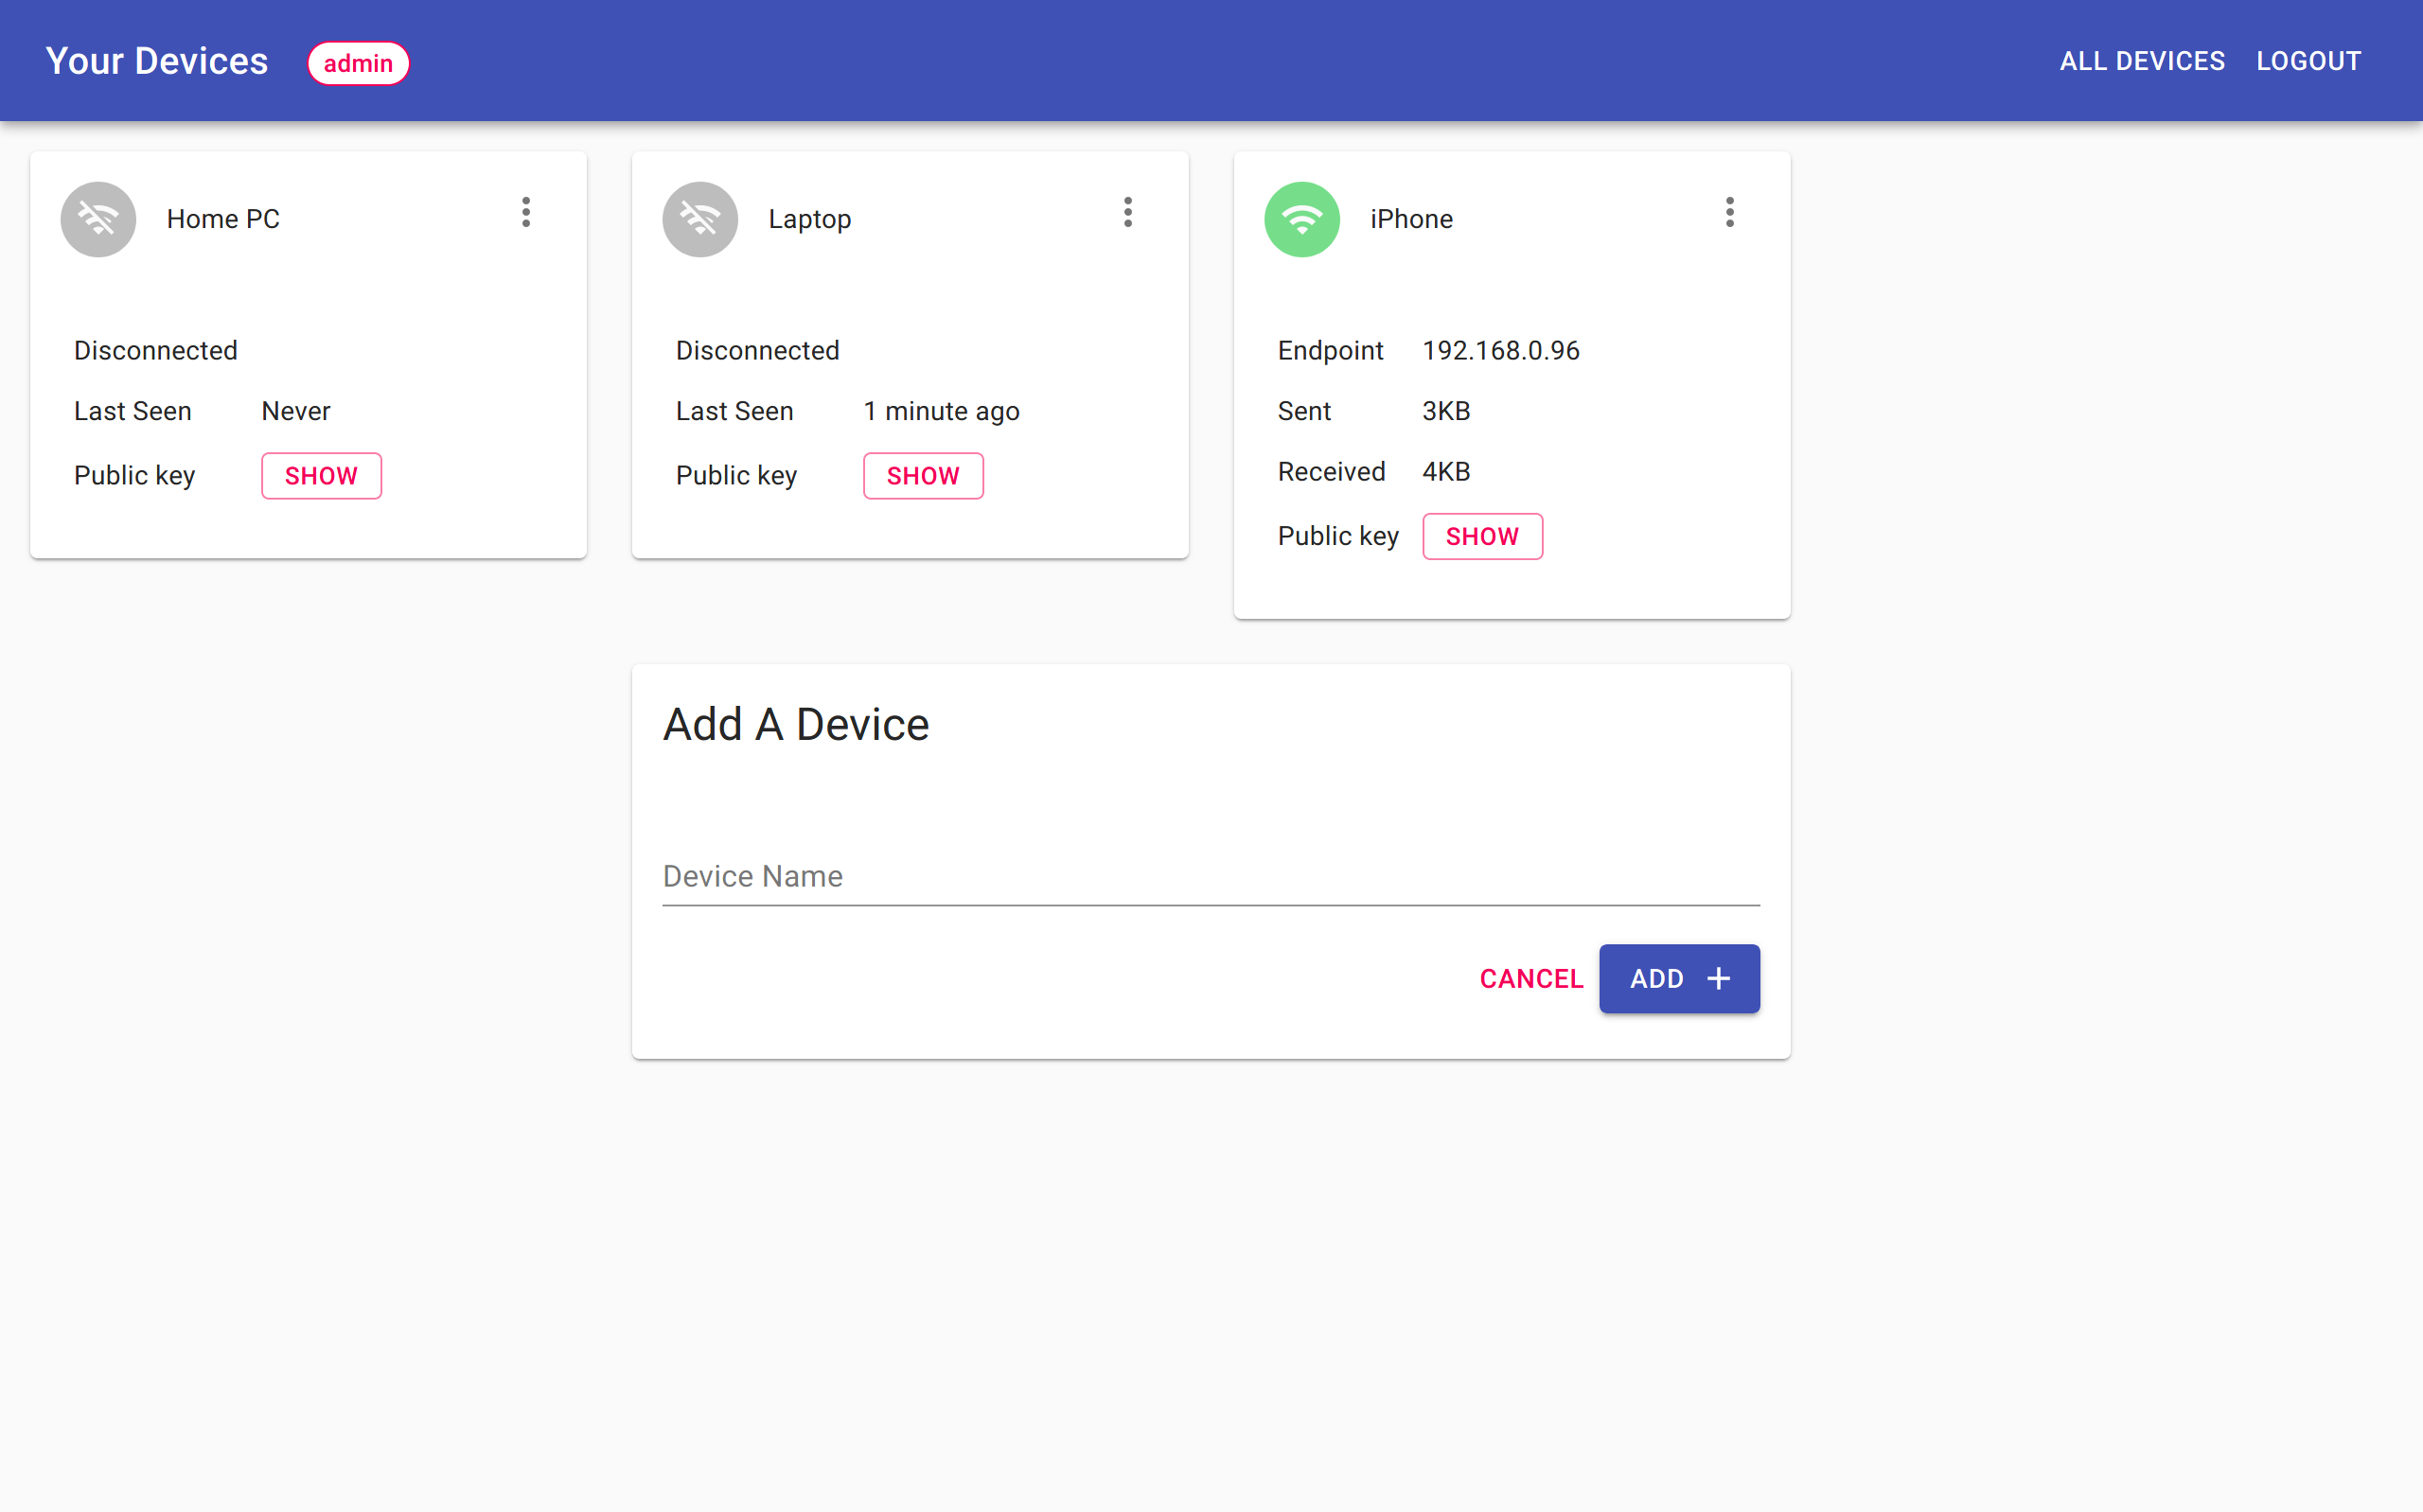
The admin interface looks like this:
Running wg-access-server with Docker
The easiest way to run wg-access-server is by using Docker and docker-compose. If you are new to Docker and docker-compose, you might want to read some tutorials about it first.
I use the following docker-compose.yml config file for wg-access-server:
version: "3.4"
services:
  wireguard:
    container_name: wireguard
    image: place1/wg-access-server
    cap_add:
      - NET_ADMIN
    environment:
      WG_WIREGUARD_PRIVATE_KEY: {put your private key here}
      WG_STORAGE: sqlite3:///wireguard-clients/db.sqlite3
      WG_EXTERNAL_HOST: my-host.com
      WG_CONFIG: "/config.yaml"
      WG_ADMIN_USERNAME: {put your admin username here}
      WG_ADMIN_PASSWORD: {put your plain text admin password here}
    volumes:
      - ./data/wg-access-server:/data"
      - ./data/wireguard-clients:/wireguard-clients
      - ./conf/wireguard/config.yaml:/config.yaml:ro # if you have a custom config file
    ports:
      - "8000:8000/tcp"
      - "51820:51820/udp"
    devices:
      - "/dev/net/tun:/dev/net/tun"
    restart: unless-stopped
⚠️ Note that if you don’t want to use a plaintext admin password, you have to specify it in the config file. It’s probably better than my plaintext config, but I don’t expose the admin interface anywhere, so I don’t really care.
ℹ️ You can generate the WireGuard private key with Docker: docker run -it place1/wg-access-server wg genkey
In ./conf/wireguard/config.yaml I specified the external host. By doing so, the generated client profiles contain the correct url. That way they can be used right away:
loglevel: info
wireguard:
  externalHost: "my-external-domain.com"
ℹ️ Don’t forget to open UDP port 51820 on your firewall.
ℹ️ If you want to expose the admin interface, you also have to open TCP port 8000 on your firewall (But in that case you better proxy it through an HTTPS web server like Treafik or Caddy).
Once everything is configured you can use the known docker commands to start the service:
sudo docker-compose up -dClient device configuration for wg-access-server with WireGuard apps
Next step is to configure the client devices. Wireguard has apps for iOS, macOS, Android, Windows, any Linux flavour, … Check out the most up-to-date list on their website.
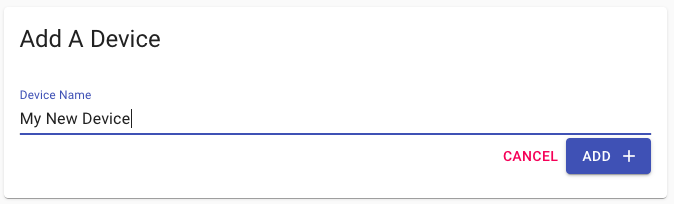
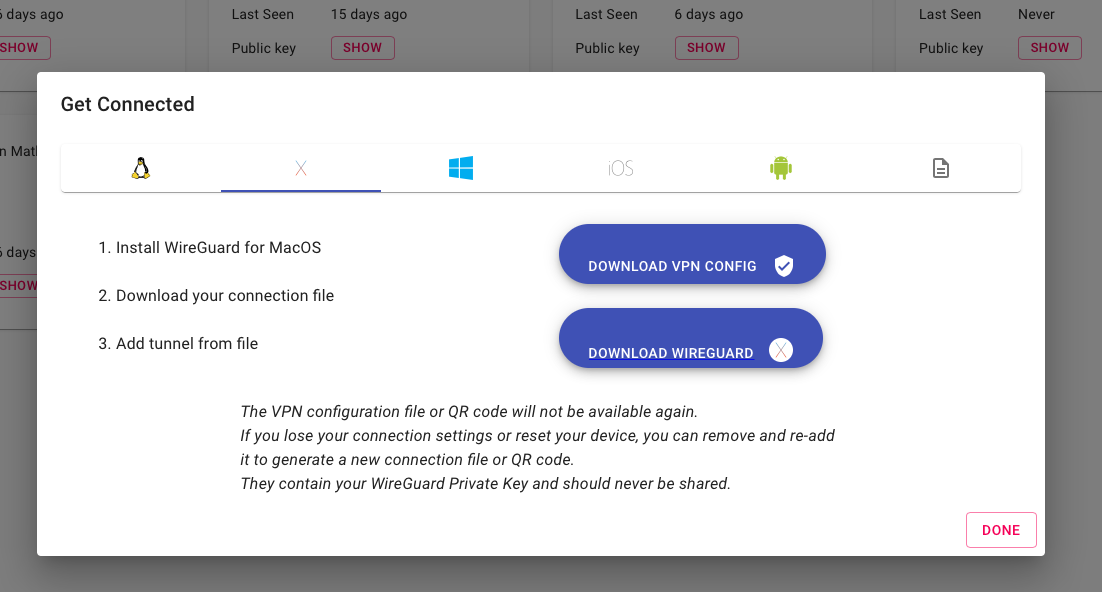
Adding a new client configuration is very easy. Navigate to your wg-access-server admin interface (e.g. local-ip-of-adguard-host:8000. Then you just specify the name of the device and click on Add.
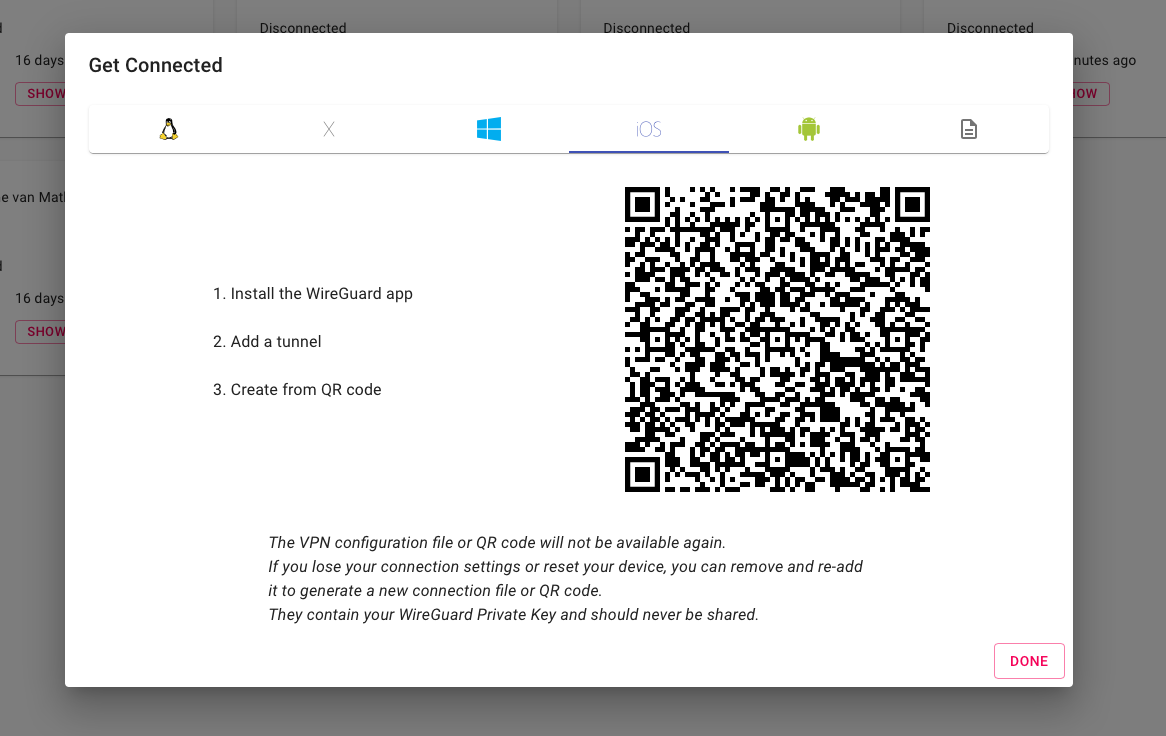
Once it is created, the client configuration will be displayed in the admin interface.
⚠️ Note that you can only see this configuration once, afterwards it will be permanently deleted.
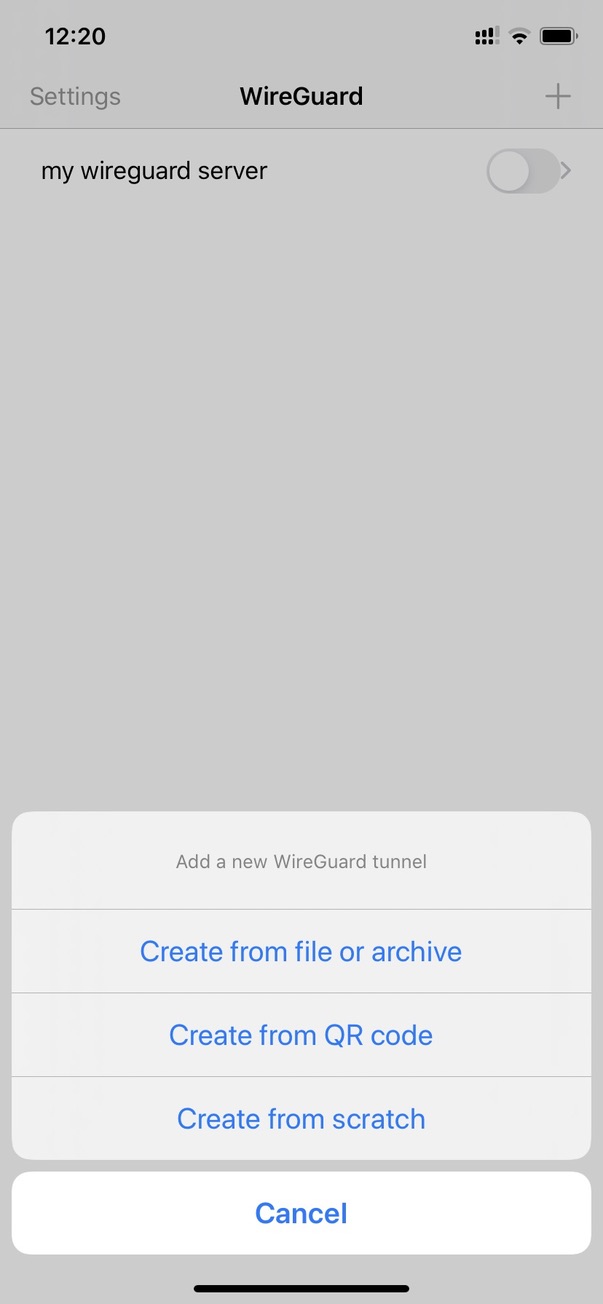
If you are configuring for a mobile device, you can scan the QR code with the Wireguard app for the most simple configuration.
On your iPhone:
You can also just download the profile (for e.g. desktop clients):
Voila, your VPN is all setup!
Conclusion
Setting up your personal VPN with Wireguard, wg-access-server and Docker is stupidly simple.