I guess everyone knows the Raspberry Pi, a tiny, extendable single-board computer that is capable of doing almost everything. But have you already used the Raspberry Pi with the HifiBerry, a better sound card? The HifiBerry is a high fidelity DAC (digital-to-analog converter) which brings high-quality sound to the Pi. (Yes, it’s very easy to install, it’s just a smaller board you put on the Raspberry Pi)
Having hardware for a hifi streaming device is the first part, but software is even more important… Ever heard of Volumio? It’s a complete operating systems with a built-in music player that you can run on a lot of devices (including the Raspberry Pi). Installing it on my Pi with HifiBerry, it allowed me to stream from any device to my hifi DENON amplifier and a lot more.
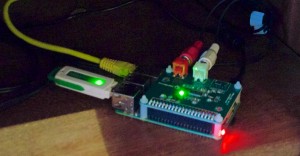
Setup
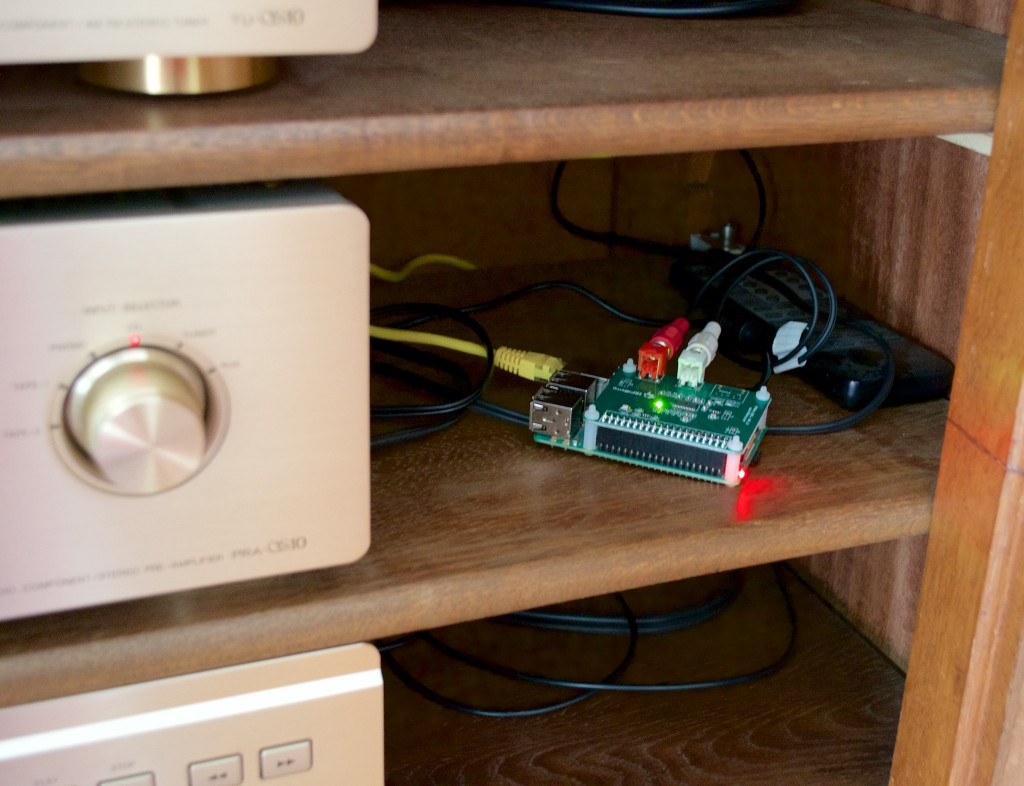
Here is our living room setup:
- Rasberry Pi B+
- HifiBerry DAC+
- Volumio
- Good old DENON amplifier with excellent speakers
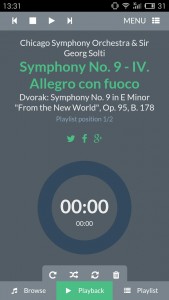
Volumio
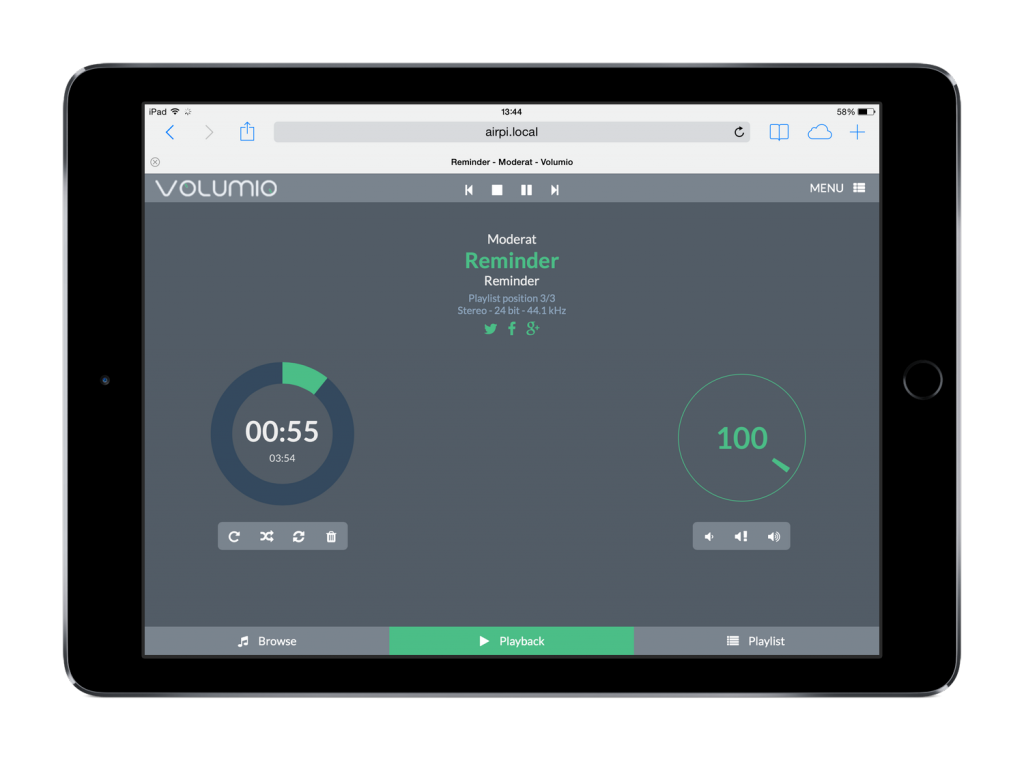
Volumio is an incredible open source project, you can install it very easily (it’s well documented on their website) on your Raspberry Pi. Once installed, you can navigate to the IP (or Bonjour .local address) of the Pi and access the control panel where you can adjust any settings you want. (It’s where you can easily select the HifiBerry Dac for output, enable Airplay streaming, or install updates …). The web inteface comes with a very nice music player:
Streaming
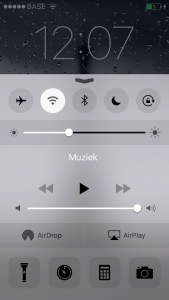
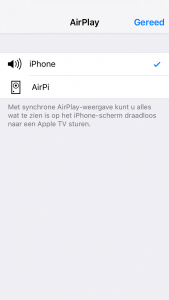
Streaming to the Pi from iPad/iPhone/Mac is incredibly easy (using Apple’s Airplay protocol of course). On iOS you click on the “Airplay” icon in the control center, and then you select your Volumio.
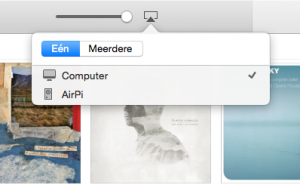
On OS X you click on the sound icon while holding the alt (= option) key, and you select your Volumio. You can also click on the “Airplay” icon in iTunes if you only want to stream your music. (which is what I usually do).

On Android things are bit harder. If you are lucky (which I was by buying a Meizu m2 with some preinstalled apps), your phone comes with a default music app, which supports DLNA out the box. This makes things (almost) as easy as on iOS.


If however, you don’t have such an app, you need to look for solutions. You can stream al your sound using AirAudio (root required) or stream your music using doubleTwist or BubbleUPnP. There are surely other apps available for streaming to DLNA/Airplay. I’m fairly new to Android, so feel free to comment with good music players for Android which support Volumio!
Streaming from Linux (Ubuntu in this example) is also possible, using DLNA, you can do so using Pulseaudio:
$ sudo add-apt repository ppa:qos/pulseaudio-dlna
$ sudo apt-get update && sudo apt-get install pulseaudio-dlna
$ pulseaudio-dlna
You can then go to “Settings”, “Volume” and select your Volumio.
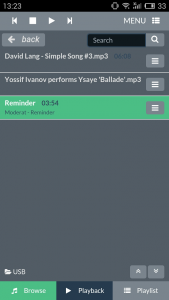
USB
You can also play music from a USB drive. Simply attach your USB storage to the Pi, and refresh the data folder in Volumio. This way you can play any music you or your friends put on the drive. Note that this probably won’t work with portable hard drives which require power from the Pi. A powered USB hub (or just using a powered USB drive instead) solves this.
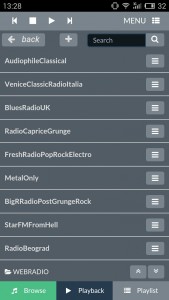
Webradios
Volumio comes standard with a huge list of webradio streams, which is one of the features I really like. You can easily select a webradio, stream it for a whole day. That way you can discover new music, since Volumio reads the metadata from the webradio and displays some info.
But there is more: you aren’t limited to this list of web radios. You can add web radio’s by downloading the .m3u file and uploading it to your Raspberry Pi, by using the Volumio shares you can find in the list of network devices.
Others
And there are even more ways to listen to your favorite content. You can also upload files to your Raspberry Pi (again using the Volumio shares on your computer) and play them directly, without having to put them on a USB drive.
You can also play music from your NAS, using Samba or NFS.
Conclusion
All together this is the perfect streaming solution for me. For less than 90 euros, I have a complete setup, which is easy to use: everyone in the house understands the system. And when I show it to other they are immediately interested! A family member was so keen that he already bought himself the complete kit (Pi + Volumio + HifiBerry) and installed it for himself!
I was also astound by the sound quality of the HifiBerry DAC+: I expected decent quality, but the sound quality in combination with the DENON amp is really excellent. If you already have an external DAC (which I have not in the living room), you can also buy the HifiBerry Digi. This gives you a bit-perfect digital output signal to your own DAC, which makes it possible to omit all possible noise from the Raspberry Pi’s power supply (which is not that great).
Note: The developers of Volumio are currently working Volumio 2, which will even be cooler!
Great article currently using BubbleUPnP on my phone and a BubbleUPnP server. Great combination. Together they support real-time reencoding (with beefy hardware) of videos so my Blu-ray files will stream over the internet, and they enhance Google Cast and CastAudio functionality.
I have a couple of Raspberry Pis with HiFiBerry Amp+. Right now I’m looking to connect a Google CastAudio to a USB device and stream Audio. I have found a couple of USB devices and been able to record the steaming audio from the Cast Audio, but have not been able to stream it to the Amp+ without a delay that messes up the grouping feature. Anybody have any thoughts or ideas?
Dont know if this is still a point of interest for you but I have the same setup that you wish for ;). I connected a behringer uca202 (fairly cheap dac) to my pi and switched the monitor switch on the unit to on. The result is that the output is now both the analog input of the unit and the inpit via usb from the pi combined. So connect the chromecast to input and you are good to go…
Thanks for that info. Great minds think alike. I tried one of these bad boys and got it working, but could not group this with other Cast Audios. There seemed to be a big delay on the Raspberry Pi adventure compared to ones connected to other more conventional amps.
I kind of went a different direction, and I currently have two HiFiBerry Amp+ doing nothing right now. I bought one of these: https://www.amazon.com/gp/product/B017W13O5W
I also built one that had the following components as well as a Cast Audio.
https://www.amazon.com/gp/product/B0181Z4M4A
https://www.amazon.com/gp/product/B00VA27NRK
https://www.amazon.com/gp/product/B00KKI4C1U
Thanks again for the response.